HOOPS Luminate Bridge
Welcome to the HOOPS Visualize HPS / HOOPS Luminate Bridge! In order to get started on your product, this page will provide a starting point to navigate the docs and start your journey with the bridge demo.
The purpose of this demo is to give an example of the integration of HOOPS Luminate into an HPS application. It demonstrates the integration of realistic rendering into a CAD application, and gives feedback about what realistic rendering is and what it could be use for.
The demonstration allows us to load a 3D model, navigate the model (using methods such as rotation, panning, and zoom), and finally save it as a .red Luminate file.

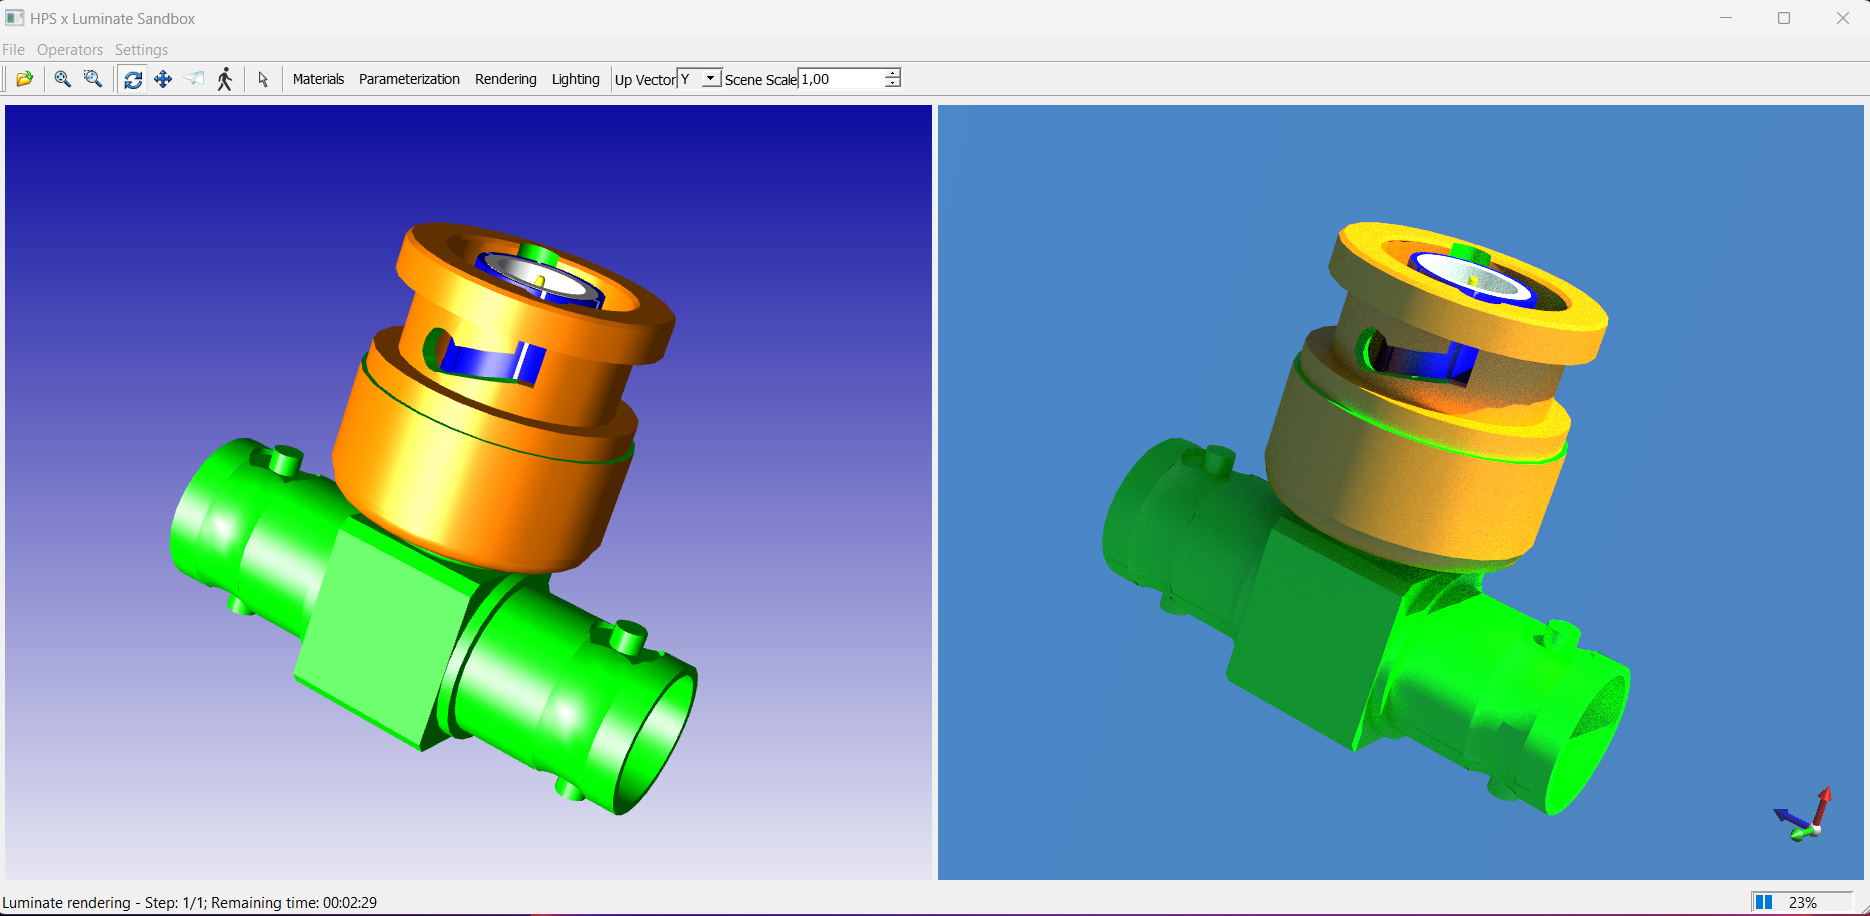
Real Time Rendering (left) vs Path Tracing Rendering (right). At the top of the image, you will see some tools to manipulate the real time view. At the bottom of the image, note some information about the rendering and progress status
Warning
The demo does not emphasize the full capabilities of HOOPS Luminate and is only meant to show the steps to integrate it into another application. For more details about HOOPS Luminate capabilites, you should refer to the HL Documentation.
Within this HOOPS Visualize HPS / HOOPS Luminate bridge documentation, you will find several sections:
- Licensing: In order to use the bridge products for HOOPS Visualize HPS and HOOPS Luminate, you must first set up your licenses.
- HPS User interface: Gives a breakdown of different functionalities to the User Interface of the bridge, such as icons and their functions, as well as different widget descriptions and images.
- HPS Bridge Demo Projects: Provides a description of the different demo projects available in the Bridge, including list of different functions, calls, and widgets, along with their definitions and abilities.
- HPS Use Cases: Offers the different use cases of the Bridge integration, and gives comparison information between Default Use Cases and Advanced Use Cases.
Default Users
The purpose of this demonstration is to act as a proof of concept. You can use the demo to see how we integrate HOOPS Luminate into the HV HPS application and the differents steps needed to synchronize HOOPS Luminate with the data from HOOPS Visualize (i.e. camera, scene, materials etc…). Currently, not all the data is converted; this results in some differences between the two rendering.
Advanced Users
You can use the demo to solo test HOOPS Luminate and create your own functionalities. This implies to write your own HOOPS Luminate code from the application hps_qt_hoops_luminate_sandbox, or modify the existing hoops_luminate_bridge to create new functionalities.
Guidance Between Default and Advanced Users
The default mode is designed for people who want to integrate a HOOPS Luminate widget into their application. You can look around and see how we integrate it into our own. You can use the hoops_luminate_brdge library as it is.
The advanced mode is designed for people who want to dive deeper into the HOOPS Luminate functionalities and the data conversion necessary to go from HV HPS to HOOPS Luminate. You can modify the source code of the hoops_luminate_bridge project to add functionalities, or modify the current ones.
Finally, You can use a set of widgets, called hoops_luminate_widgets, to integrate more advanced features into your Qt application; As to whether this ability falls under default or advanced depends on your familiarity with Qt. If you are using MFC, you will need to recreate these set of widgets on your own.
