Sample Code
This section provides sample applications that demonstrate key features and workflows of the HOOPS Exchange API. Each example highlights specific use cases, such as file conversion, metadata extraction, and geometry processing, serving as practical starting points for integrating the API into your projects.
While we aim to provide examples in both C and C#, some samples are currently available in only one language. Future updates will expand language coverage to include all key functionalities.
In the meantime, you can adapt existing examples to your preferred language, as the C# API mirrors the functionality of the C API through its bindings. Refer to the C# API Primer for guidance.
| Name | Description | C/C++ | C# | Category |
|---|---|---|---|---|
| Anim Work Instructions | Create animated work instructions | Publishing | ||
| B-Rep Adaptor | Adapt B-rep models to your needs | Advanced Functions | ||
| Callbacks Report | Log CAD file events and errors | Hello World | ||
| Cascaded Attributes | Manage cascaded attributes easily | PRC Model | ||
| Collision Detection | Find collisions in CAD models | Advanced Functions | ||
| Count Part Instances | Count parts in a structure | Hello World | ||
| Create PRC B-Rep | Generate PRC with geometry | PRC Model | ||
| Create PRC Cubes | Create textured cubes in PRC | PRC Model | ||
| Demo Data Model | Create interactive PDF without writing JavaScript | Publishing | ||
| Demo Functionalities | Demonstrate PDF page and table creation | Publishing | ||
| Demo Functionalities Advanced | Demonstrate advanced PDF functionalities | Publishing | ||
| Demo Layers | Generate PDFs with layers | Publishing | ||
| Dump Feature Tree | Export features to XML | PRC Model | ||
| Export 3D to HTML | Export 3D models to HTML | Publishing | ||
| Export PDF to HTML | Export 3D PDFs to HTML | Publishing | ||
| Import Publish | Create a simple 3D PDF with Advanced Publishing | Hello World | ||
| Incremental Load | Load CAD files step by step | Reading Modes | ||
| Manufacturing MBE | Create a technical data package | Publishing | ||
| Mesh Viewer | Visualize mesh data | Viewers | ||
| Multiple PRC Files | Handle multiple PRC files from a CAD assembly | Reading Modes | ||
| Multiple Configurations | Handle multi-config CAD files | Reading Modes | ||
| PDF With BOM and Carousel | Create a scrolling table with 3D assemblies | Publishing | ||
| PRC to IFC XML | Convert PRC to IFC XML format | PRC Model | ||
| PRC to XML | Convert PRC to XML format | PRC Model | ||
| Print Assembly Structure | View assembly hierarchy | PRC Model | ||
| Publish PRC Cubes | Create textured cubes in PRC | Publishing | ||
| Sew B-Rep | Modify and sew B-reps | Advanced Functions | ||
| Shattered | Break assemblies into components | Reading Modes | ||
| Translate to PK Parts | Convert CAD to Parasolid | Bridges | ||
| U3D With Animation | Add animation to U3D with PDF | Publishing | ||
| Update Data | Update PDF data | Publishing | ||
| User Defined Views | Define and activate custom view | Publishing |
How to Build And Test Our Example Codes
Beforehand, make sure you have correctly prepared your environment for building and testing HOOPS Exchange. Follow the instruction in Set Up Your Environment for more information.
Since HOOPS Exchange 2025.4.0, we provide CMake support for our sample code.
You need CMake version 3.20.2 or higher.
The example code projects follow a typical CMake workflow. If you are familiar with CMake, no special steps are required. If you are new to CMake, we recommend the official tutorial from Kitware.
To learn more or to download CMake, visit the official website.
Check if you have CMake
You can check if CMake is installed by running the following command in your terminal or command prompt:
cmake --version
This will show the version of CMake on your system. If you do not have it, or if the version is lower than 3.20.2, you should install a newer version.
You can download the installer from the CMake downloads page. There are versions for Windows, macOS, and Linux.
Building sample code with the CMake UI
CMake has a graphical interface that can help you set up your project step by step. This is available on Windows, macOS, and Linux.
First, open the CMake application.
- In the field Where is the source code, choose the folder that contains the sample code.
- In the field Where to build the binaries, choose a different empty folder. This is where the build files will be created.
Click the Configure button. CMake will ask you which compiler or tool you want to use (see Supported Platforms). After configuration, you will see some options you can change if needed.
Click Generate to create the project files.
Now you can open the generated project in your IDE and build it there.
Building sample code from the command line (POSIX)
If you prefer to use the terminal, you can also run CMake from the command line.
First, create a new folder for the build:
$ mkdir build
$ cd build
Then run CMake with the path to the sample code:
$ cmake ../path/to/samples -DCMAKE_BUILD_TYPE=Release
If you want to choose a specific compiler or generator, you can add the -G option:
$ cmake ../path/to/samples -G "Visual Studio 17 2022"
Once CMake finishes, you can build the code with this command:
$ cmake --build . --config Release
CMake will automatically run the correct build tool, such as make, ninja, or msbuild, depending on what you selected.
After building, you will find the compiled sample programs in the folder named sample_bin/ at the root of your build directory.
Build the solution
If you are on a Windows platform:
- In the
../samples/folder of your installed package, open theHOOPSExchangeSamples.slnfile using Visual Studio. - Select the Debug, x64 mode.
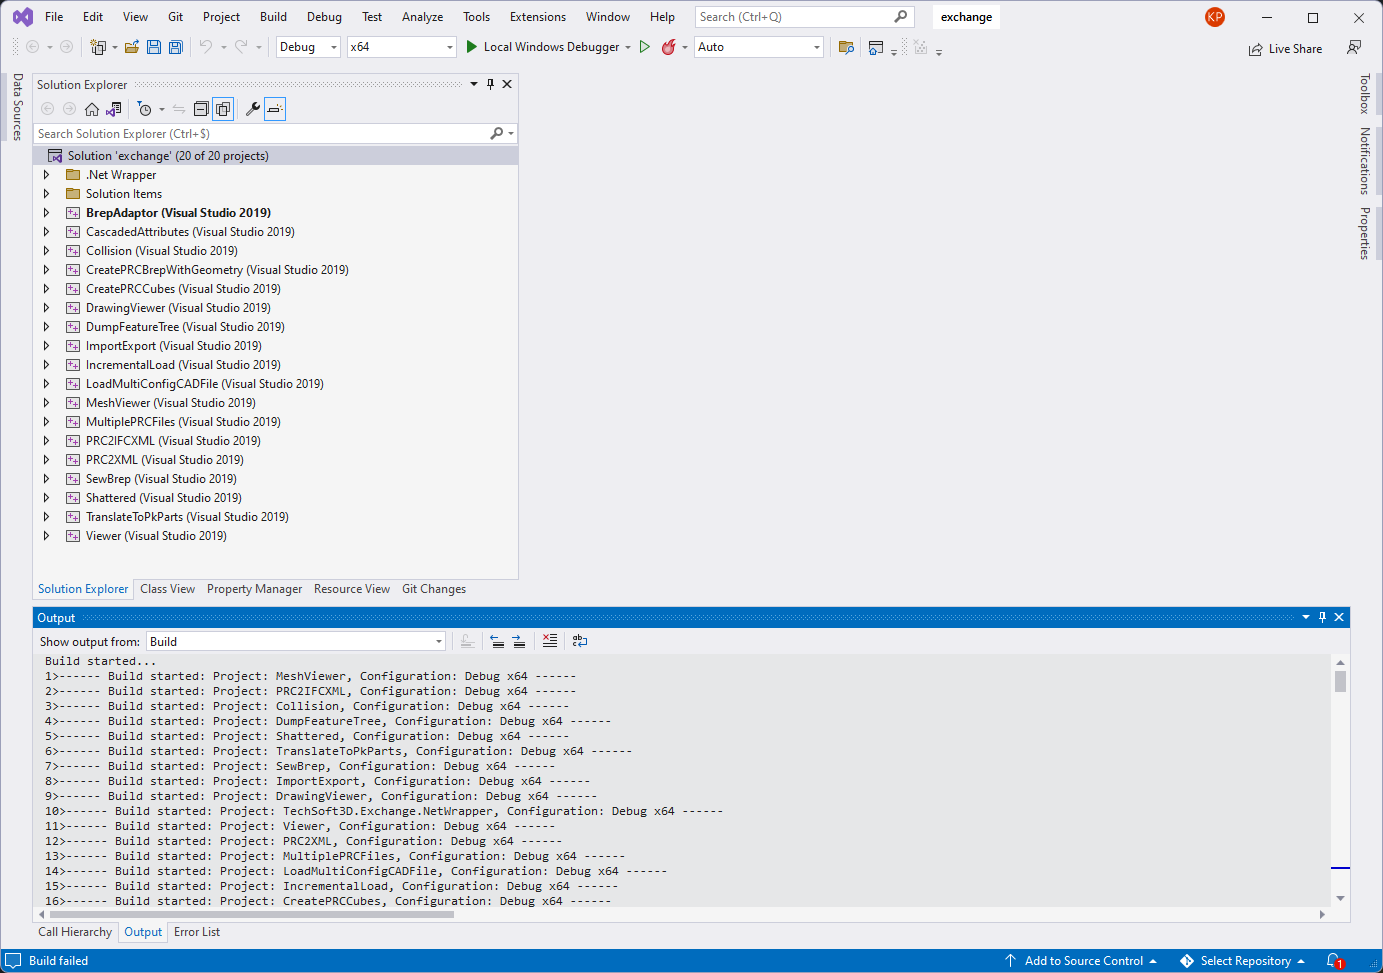
- Go to the tab Build and build the entire solution.
Out of the box you should obtain: Build: 18 succeeded, 2 failed, 0 up-to-date, 0 skipped.
The 2 failing samples are the
.Net Wrapper(our HOOPS Exchange C# sample) andTranslateToPkParts(our Bridge to the Siemens Parasolid API ).This is the expected behavior as these two samples required further more configuration to run. (Download Microsoft .NET for Visual Studio and visit the TranslateToPkParts page for more details).
- In the
Test a sample
- In Visual Studio from the Solution Tree explorer:
- Locate the sample
ImportExport - To run the sample, right click on it and select Debug -> Start New Instance.
- The sample will read a sample input file, _Aquo Bottle.CATProduct, and convert it to PRC format.
- The result file is located alongside the input file.
- Locate the newly created file _Aquo Bottle.CATProduct.prc in your output folder from the installation folder
..\samples\data\catiaV5\CV5_Aquo_Bottle - Open the HOOPS Demo Viewer desktop application.
- Drag & drop your resulting _Aquo Bottle.CATProduct.prc file to quickly visualize the assembly:
- Locate the sample
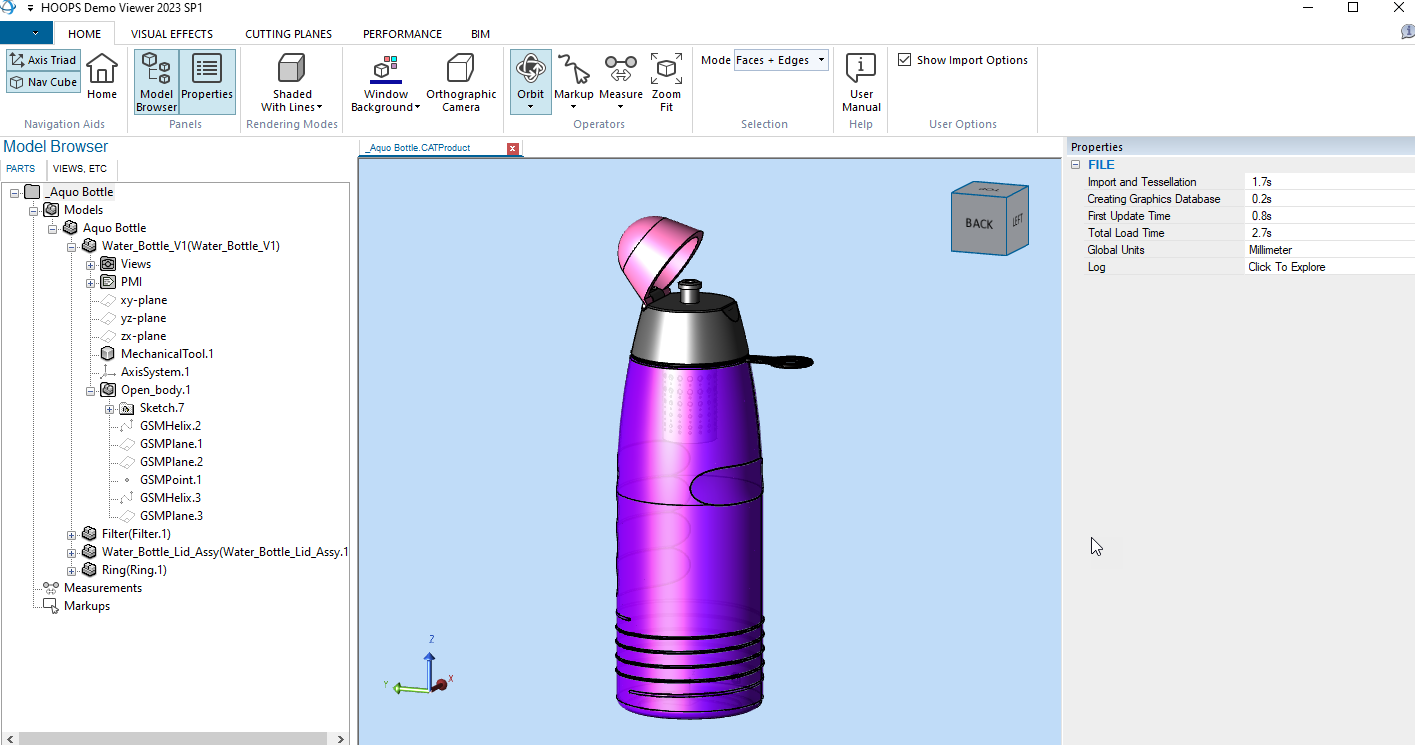
For more details on using the HOOPS Demo Viewer, consult the HDV Documentation Page.
Build the solution
- If you are on a Linux platform:
- Locate the folder
..\samples\from the installation folder. - Right click on the folder and select Open in Terminal.
- In Terminal Type
maketo build all the samples.
- Locate the folder
Out of the box all samples are built but the sample
TranslateToPkParts, our Bridge to the Siemens Parasolid API requires further more configuration to run, please visit the TranslateToPkParts page for more details.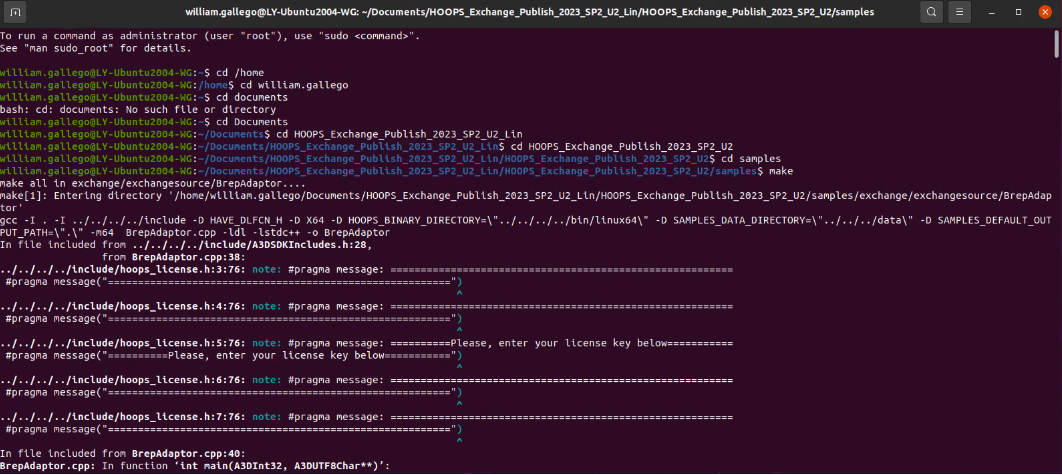
Test a sample
The HOOPS Demo Viewer application being a Windows only application, for Linux we will use the samples
ImportExportANDViewerinstead.- Locate the sample
ImportExportfrom the installation folder..\samples\hello_world\ImportExport - Right click on the folder and select Open in Terminal.
- Locate the file _Aquo Bottle.CATProduct from the installation folder
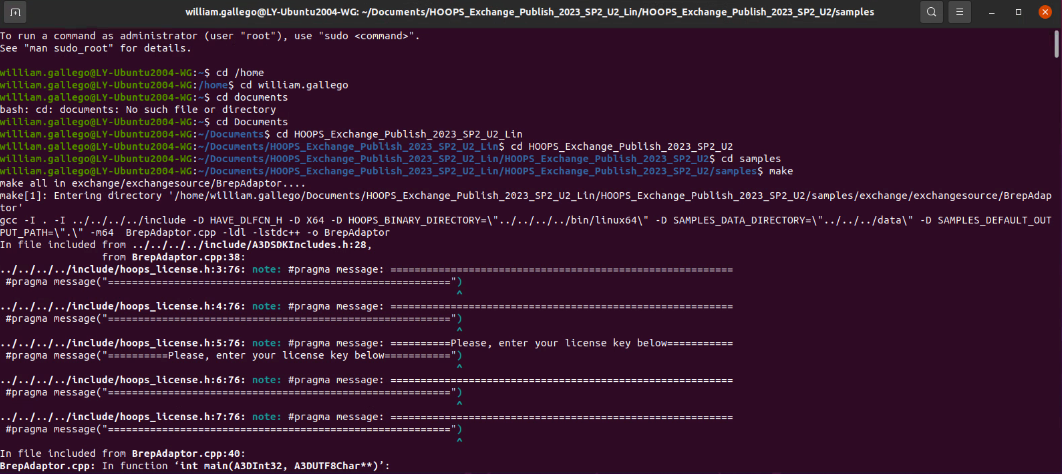
..\samples\data\catiaV5\ - Make sure the sample is already built otherwise build it again: Command Line:
make
- Run the sample
ImportExportto convert a CATIA V5 assembly called _Aquo Bottle.CATProduct to PRC format. - Command Line :
./ImportExport ..\samples\data\catiaV5\_Aquo Bottle.CATProduct ..\samples\data\catiaV5\_Aquo Bottle.CATProduct.prc
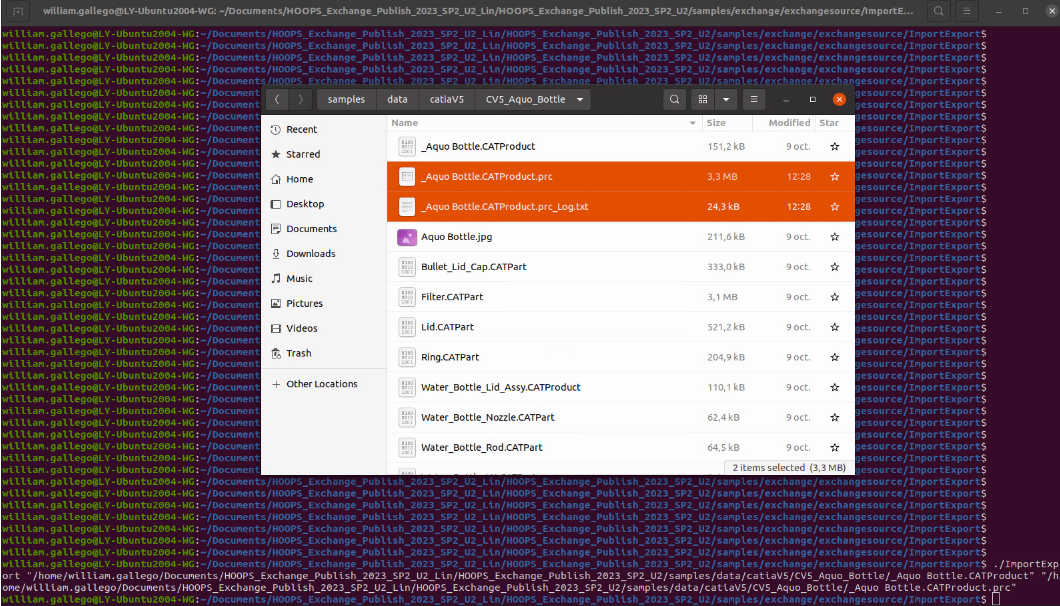
- Locate the resulting file _Aquo Bottle.CATProduct.prc from the installation folder
..\samples\data\catiaV5\ - Run the sample
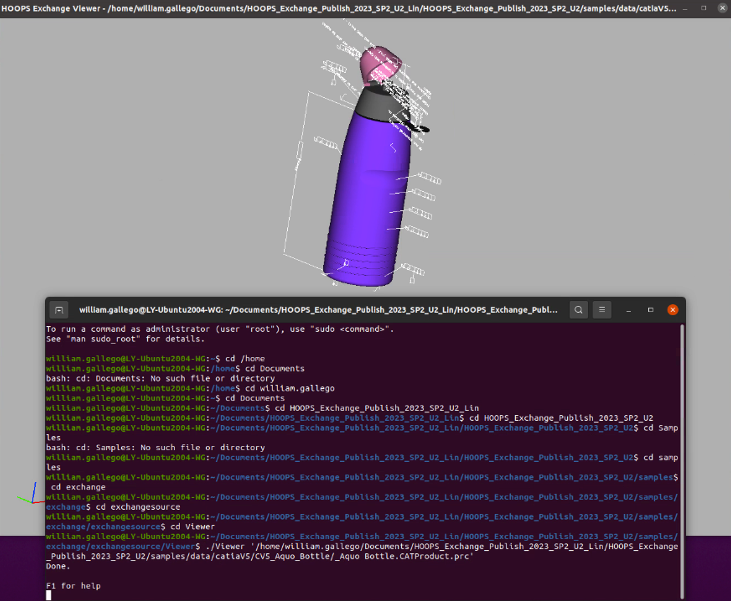
Viewerto load the PRC file in the OpenGL sample Viewer. Command Line./Viewer ..\samples\data\catiaV5\_Aquo Bottle.CATProduct.prc - _Aquo Bottle.CATProduct.prc file will be displayed in an OpenGL Windows:
- Locate the sample
Build the solution
- If you are on a macOS platform:
- Locate the folder
..\samples\from the installation folder. - Open the Terminal and set the current directory to
..\Samples - In Terminal Type
make
- Locate the folder
Out of the box all samples are built but the sample
TranslateToPkParts, our Bridge to the Siemens Parasolid API requires further more configuration to run, please visit the TranslateToPkParts page for more details.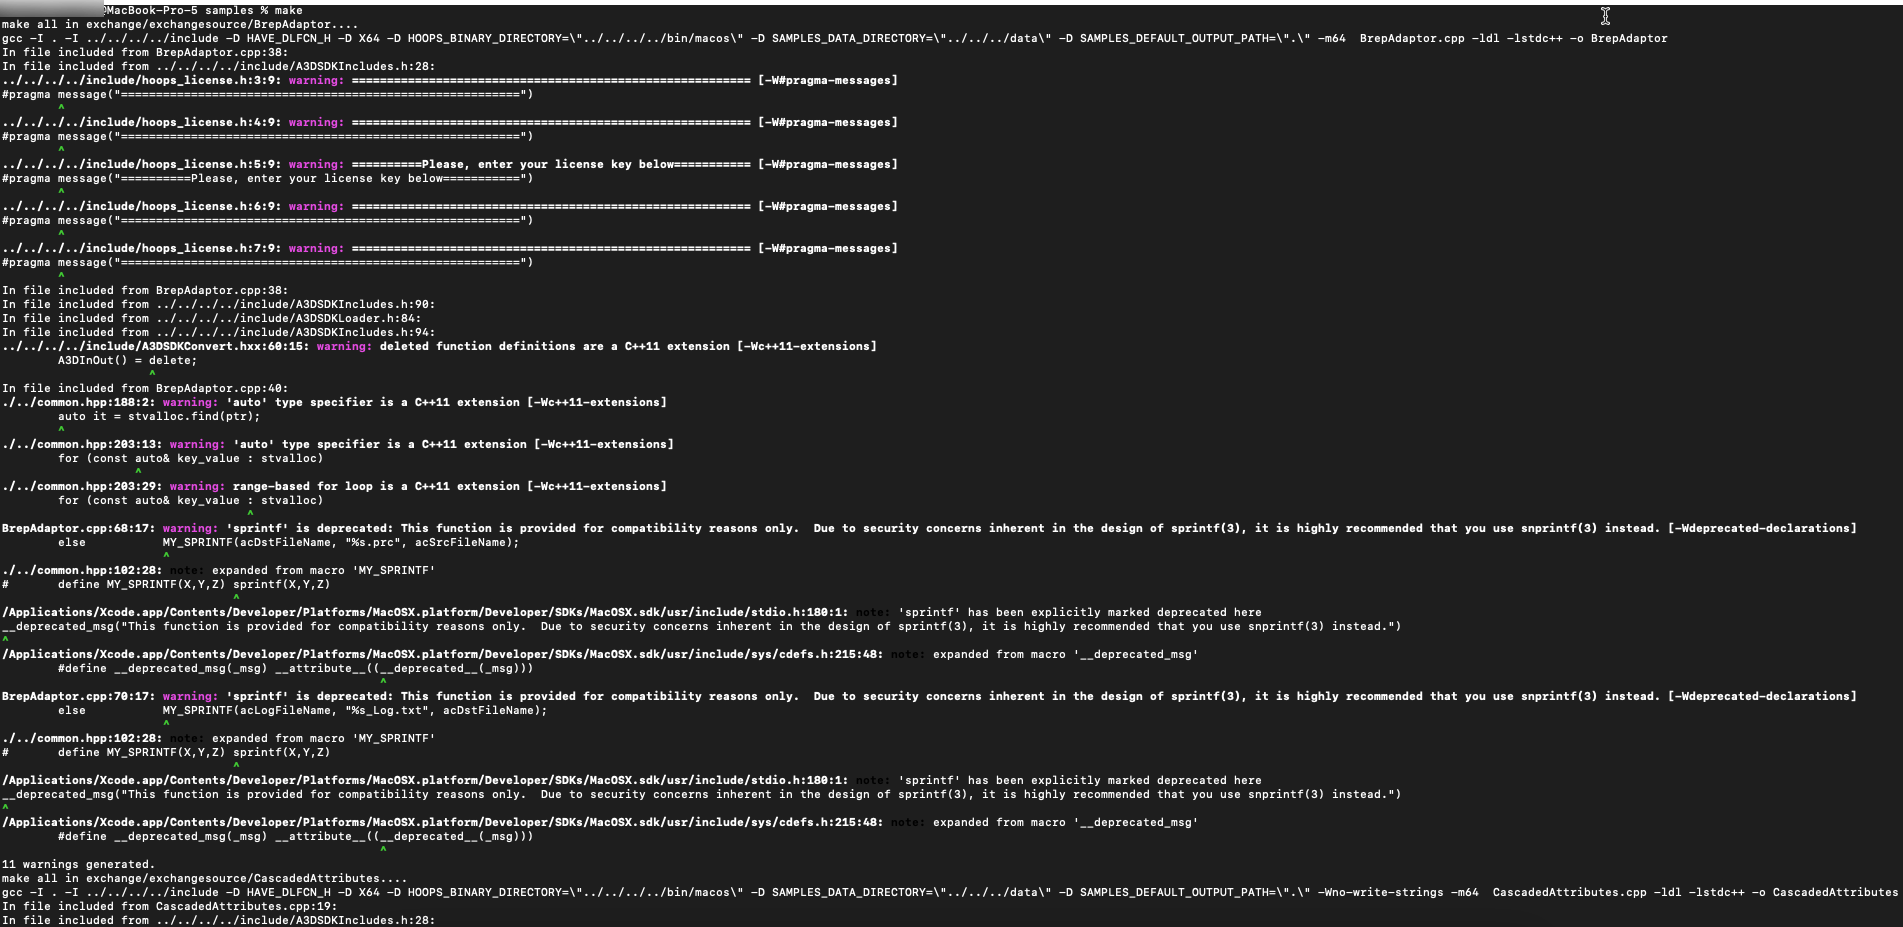
Test a sample
The HOOPS Demo Viewer application being a Windows only application, for macOS we will use the samples
ImportExportANDViewerinstead.- Locate the sample
ImportExportfrom the installation folder..\samples\hello_world\ImportExport - Open the Terminal and set the working directory to
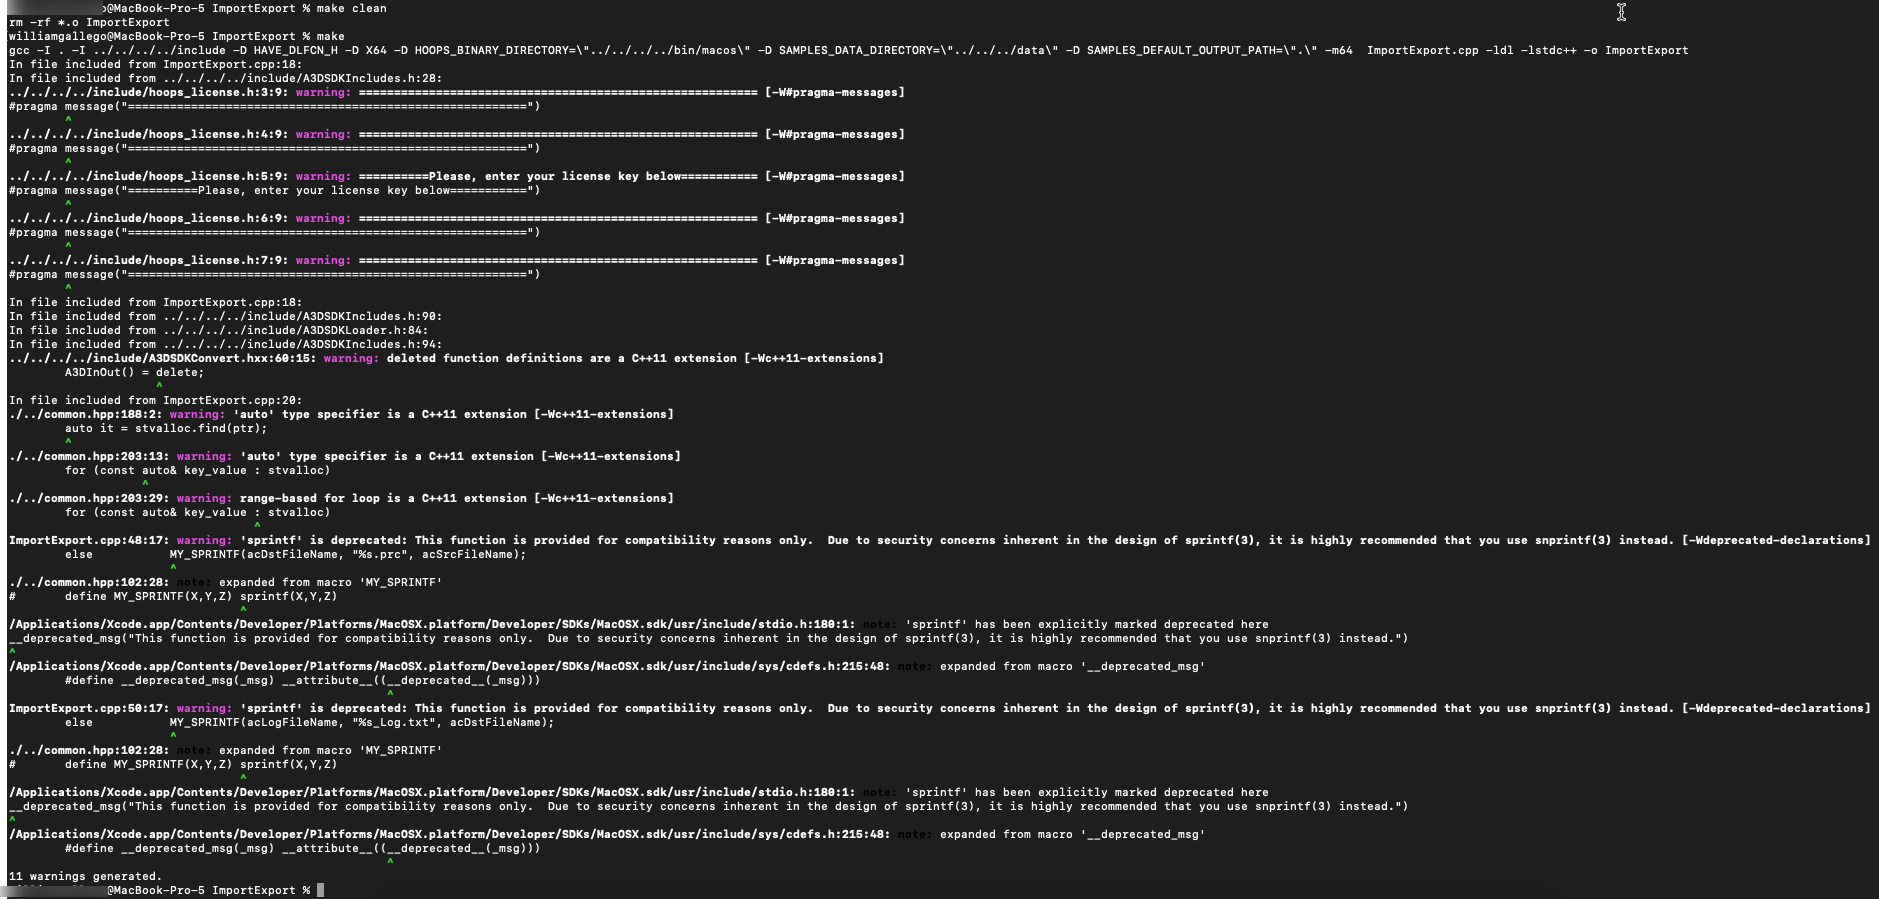
..\samples\hello_world\ImportExport - Make sure the sample is already built otherwise build it again: Command Line:
make
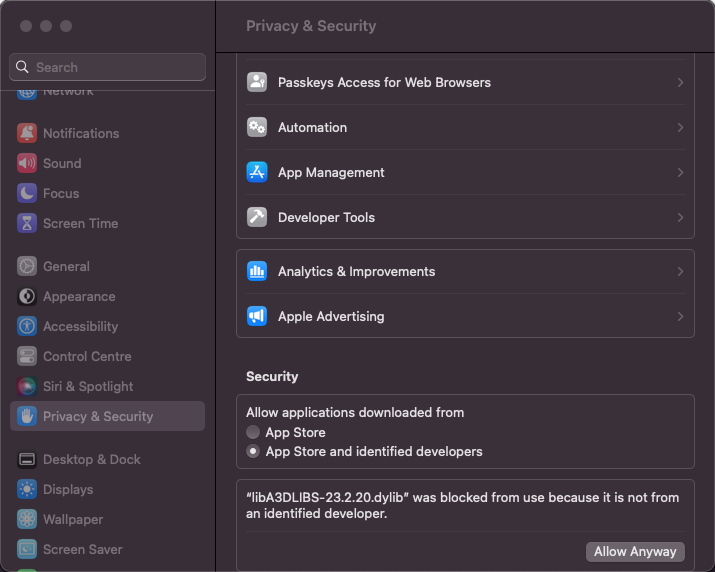
- On macOS go to System Settings and open the Privacy and Security tab.
- Check that the
libA3DLIBS.xx.x.xx.dylibfile is not blocked, is this is the case click Allow Anyway.
- Locate the file _Aquo Bottle.CATProduct from the installation folder
..\samples\data\catiaV5\ - Run the sample
ImportExportto convert a CATIA V5 assembly called _Aquo Bottle.CATProduct to PRC format. - Command Line:
./ImportExport ../samples/data/catiaV5/_Aquo Bottle.CATProduct ../samples/data/catiaV5/_Aquo Bottle.CATProduct.prc
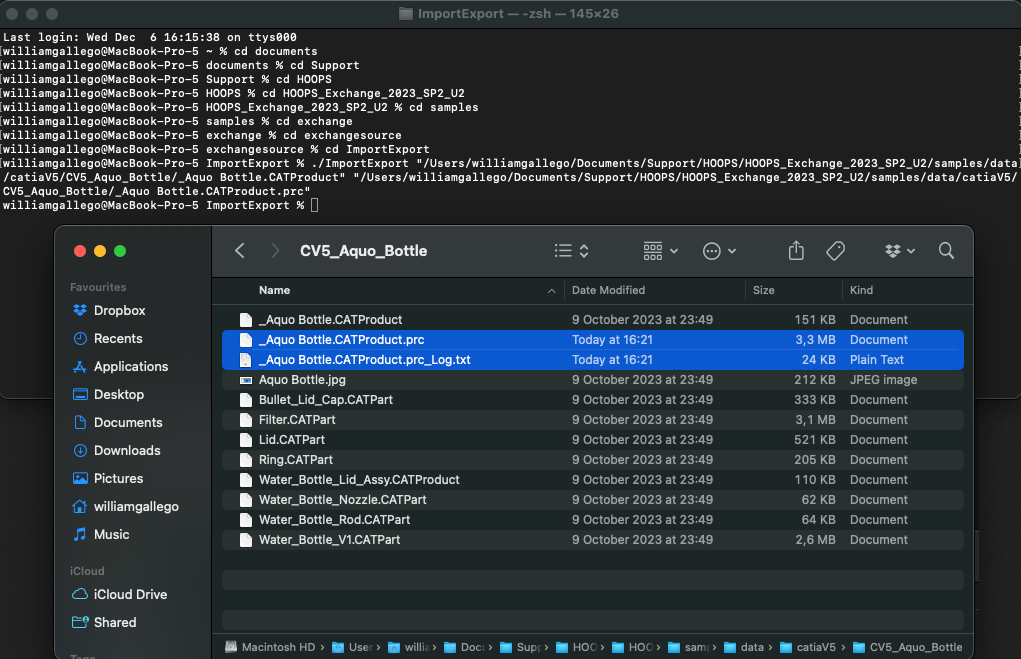
- Locate the resulting file _Aquo Bottle.CATProduct.prc from the installation folder
..\samples\data\catiaV5\ - Run the sample
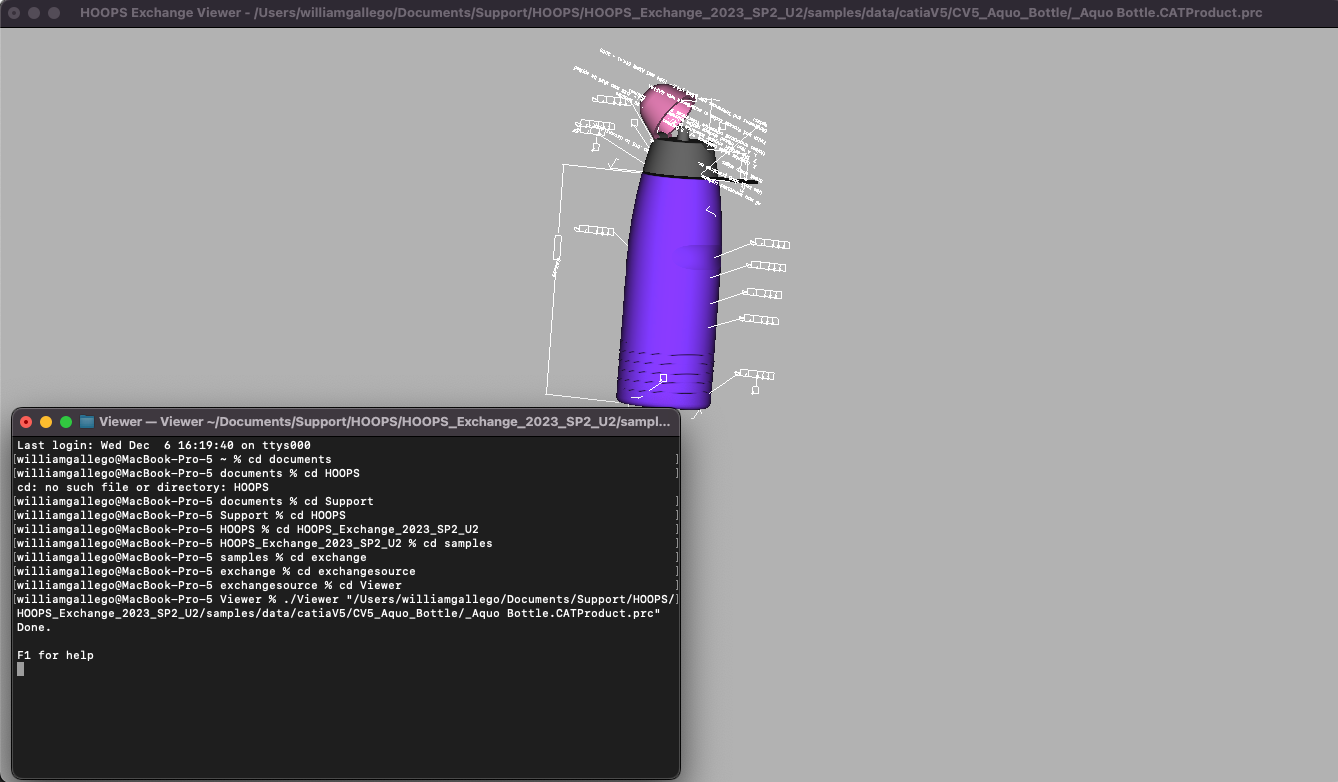
Viewerto load the PRC file in the OpenGL sample Viewer. Command Line./Viewer ..\samples\data\catiaV5\_Aquo Bottle.CATProduct.prc - _Aquo Bottle.CATProduct.prc file will be displayed in an OpenGL Windows:
- Locate the sample
HOOPS Exchange is compatible with iOS, unlike the Windows, Linux and macOS platforms HOOPS Exchange for iOS support is limited to:
- CAD Import formats:
SolidWorks, IFC, IGES, JT, PARASOLID, PDF, PRC, STEP, STEPXML, U3D- CAD Export formats:
IGES, PARASOLID, STEPThe package contains the following folders: bin, includes, samples, documentation, the samples folder only contains two samples:
PRC2XML: Sample describing how to load a CAD file and to dump the model tree structure, metadata, attributes and more.IOSWriter: Sample describing how to load a CAD file and to convert it to another format.
Build the solution
- Launch Xcode and select Open Existing Project.
- In the
../samples/ios/PRC2XMLfolder of your installed package, openPRC2XML.xcodeproj
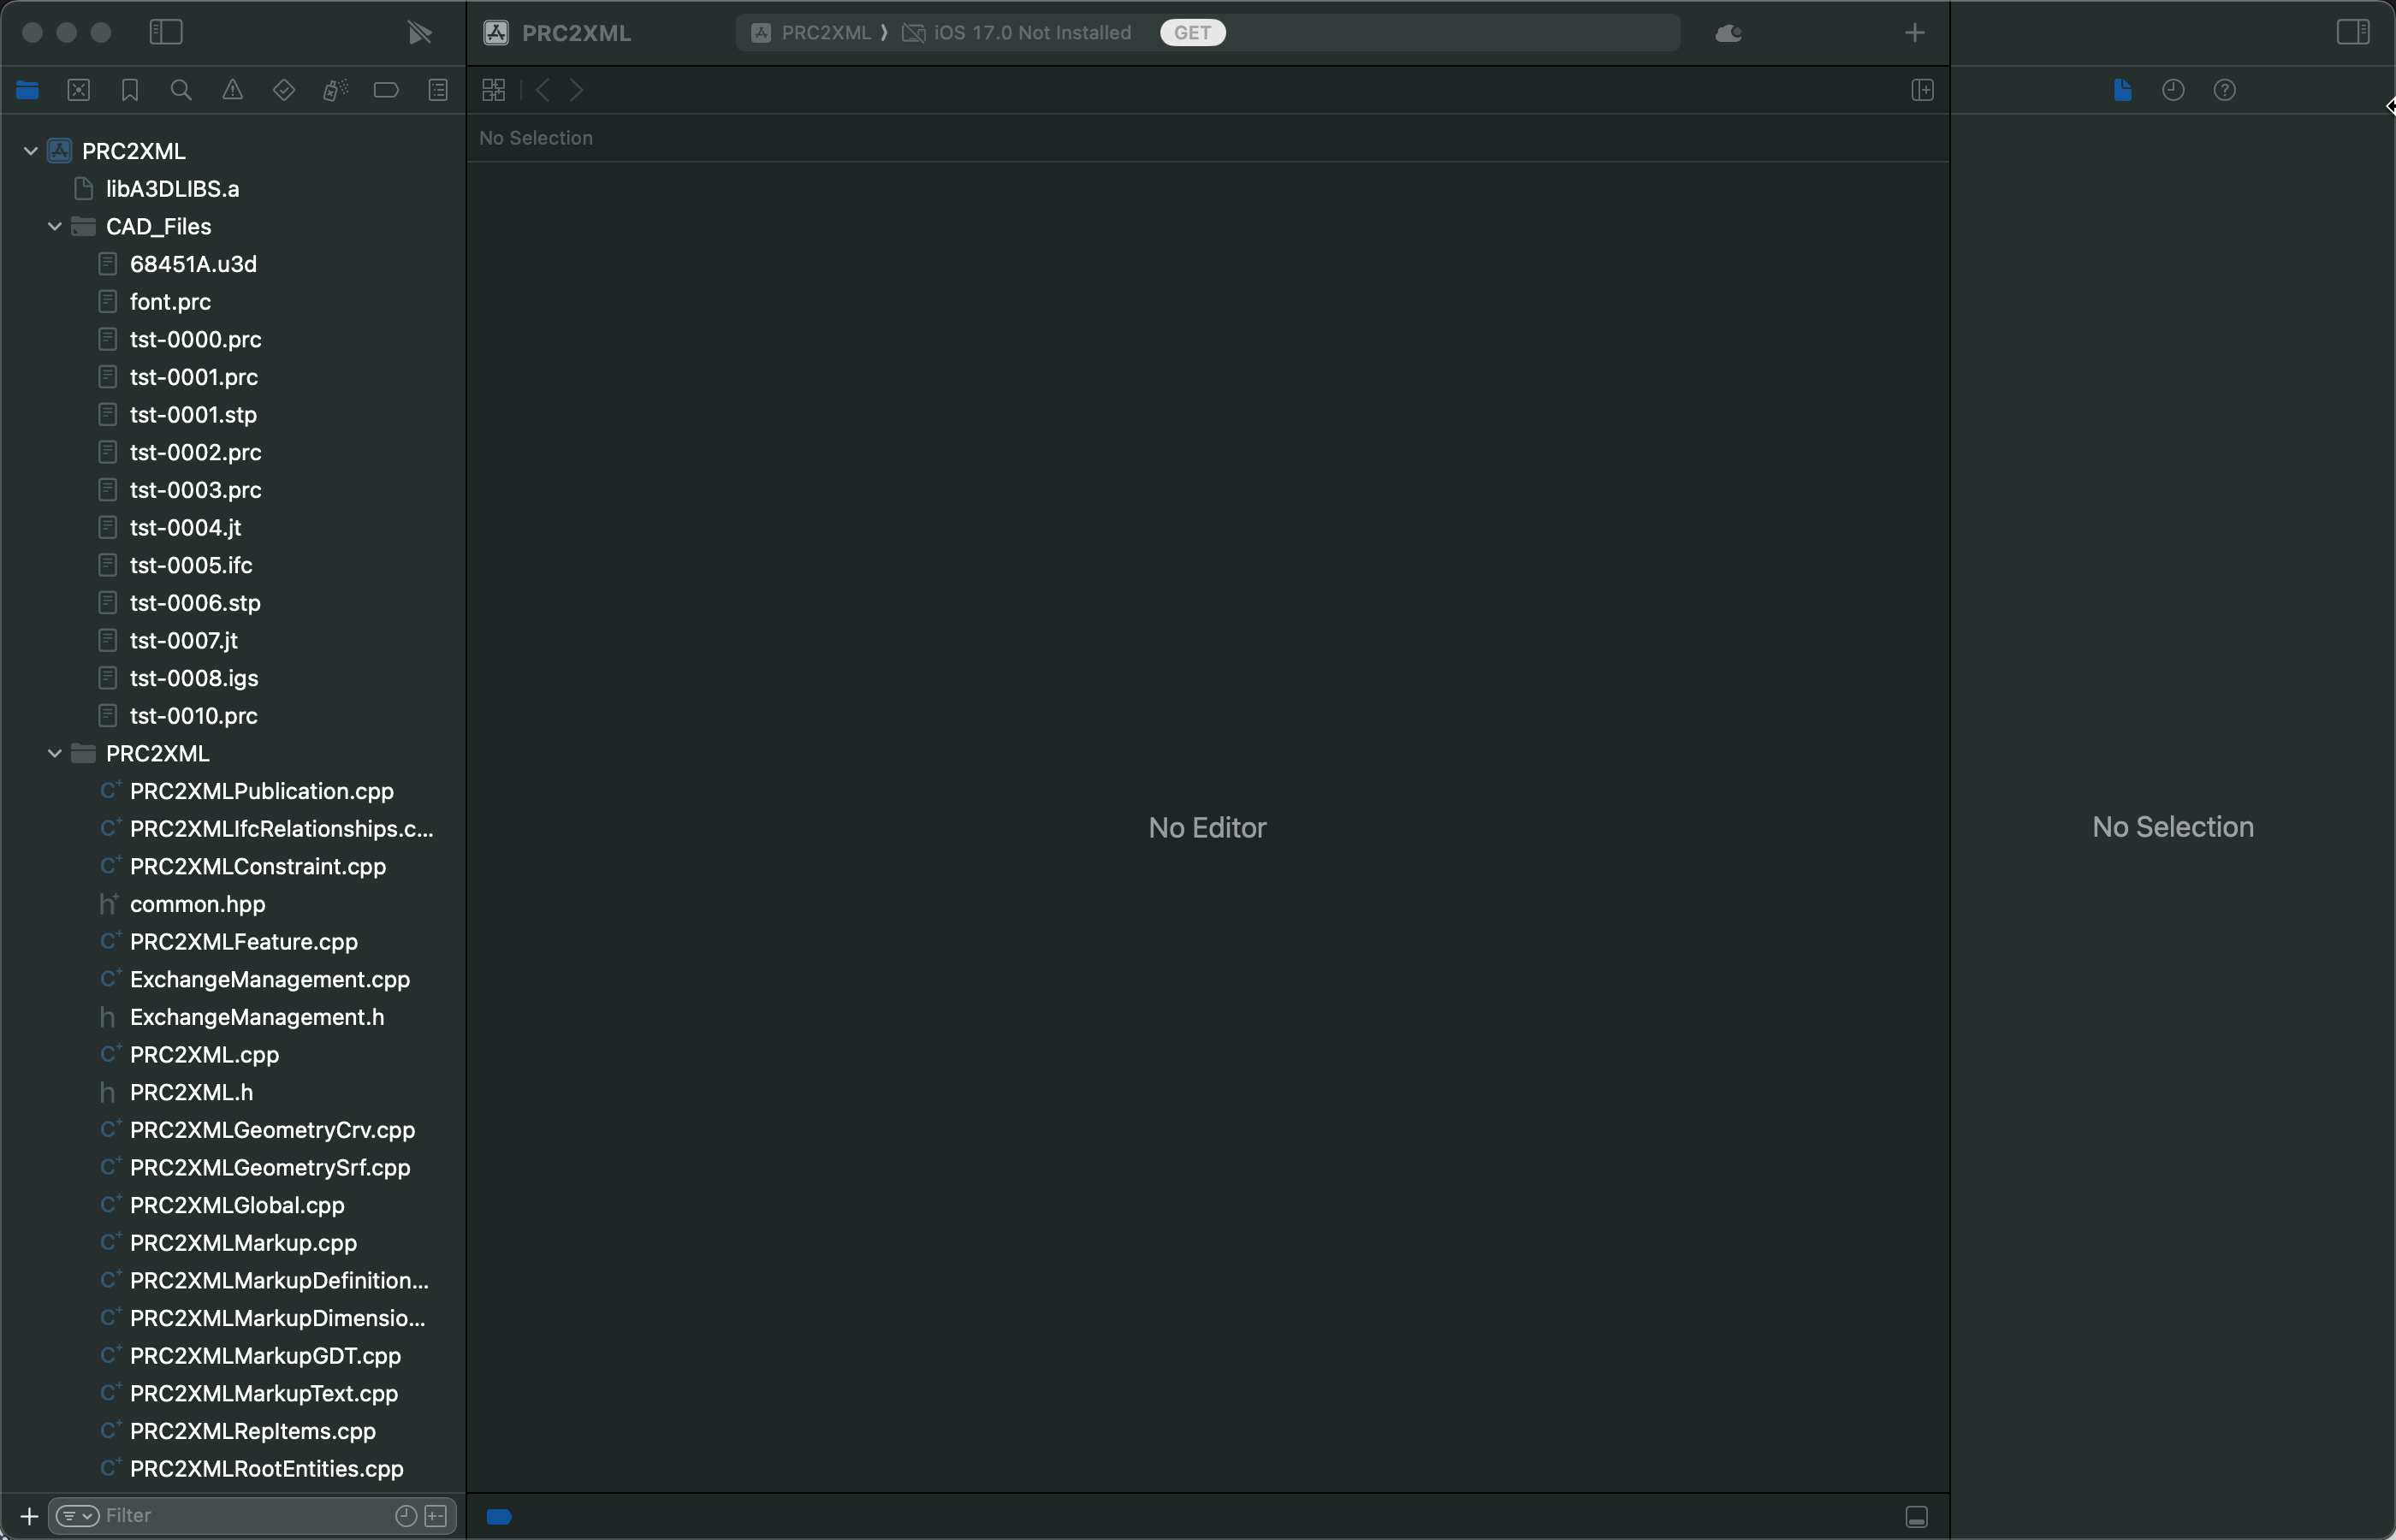
- From the Project navigator bar select the file
ts-0000.prc - Right Click
Add files to "PRCXML"...
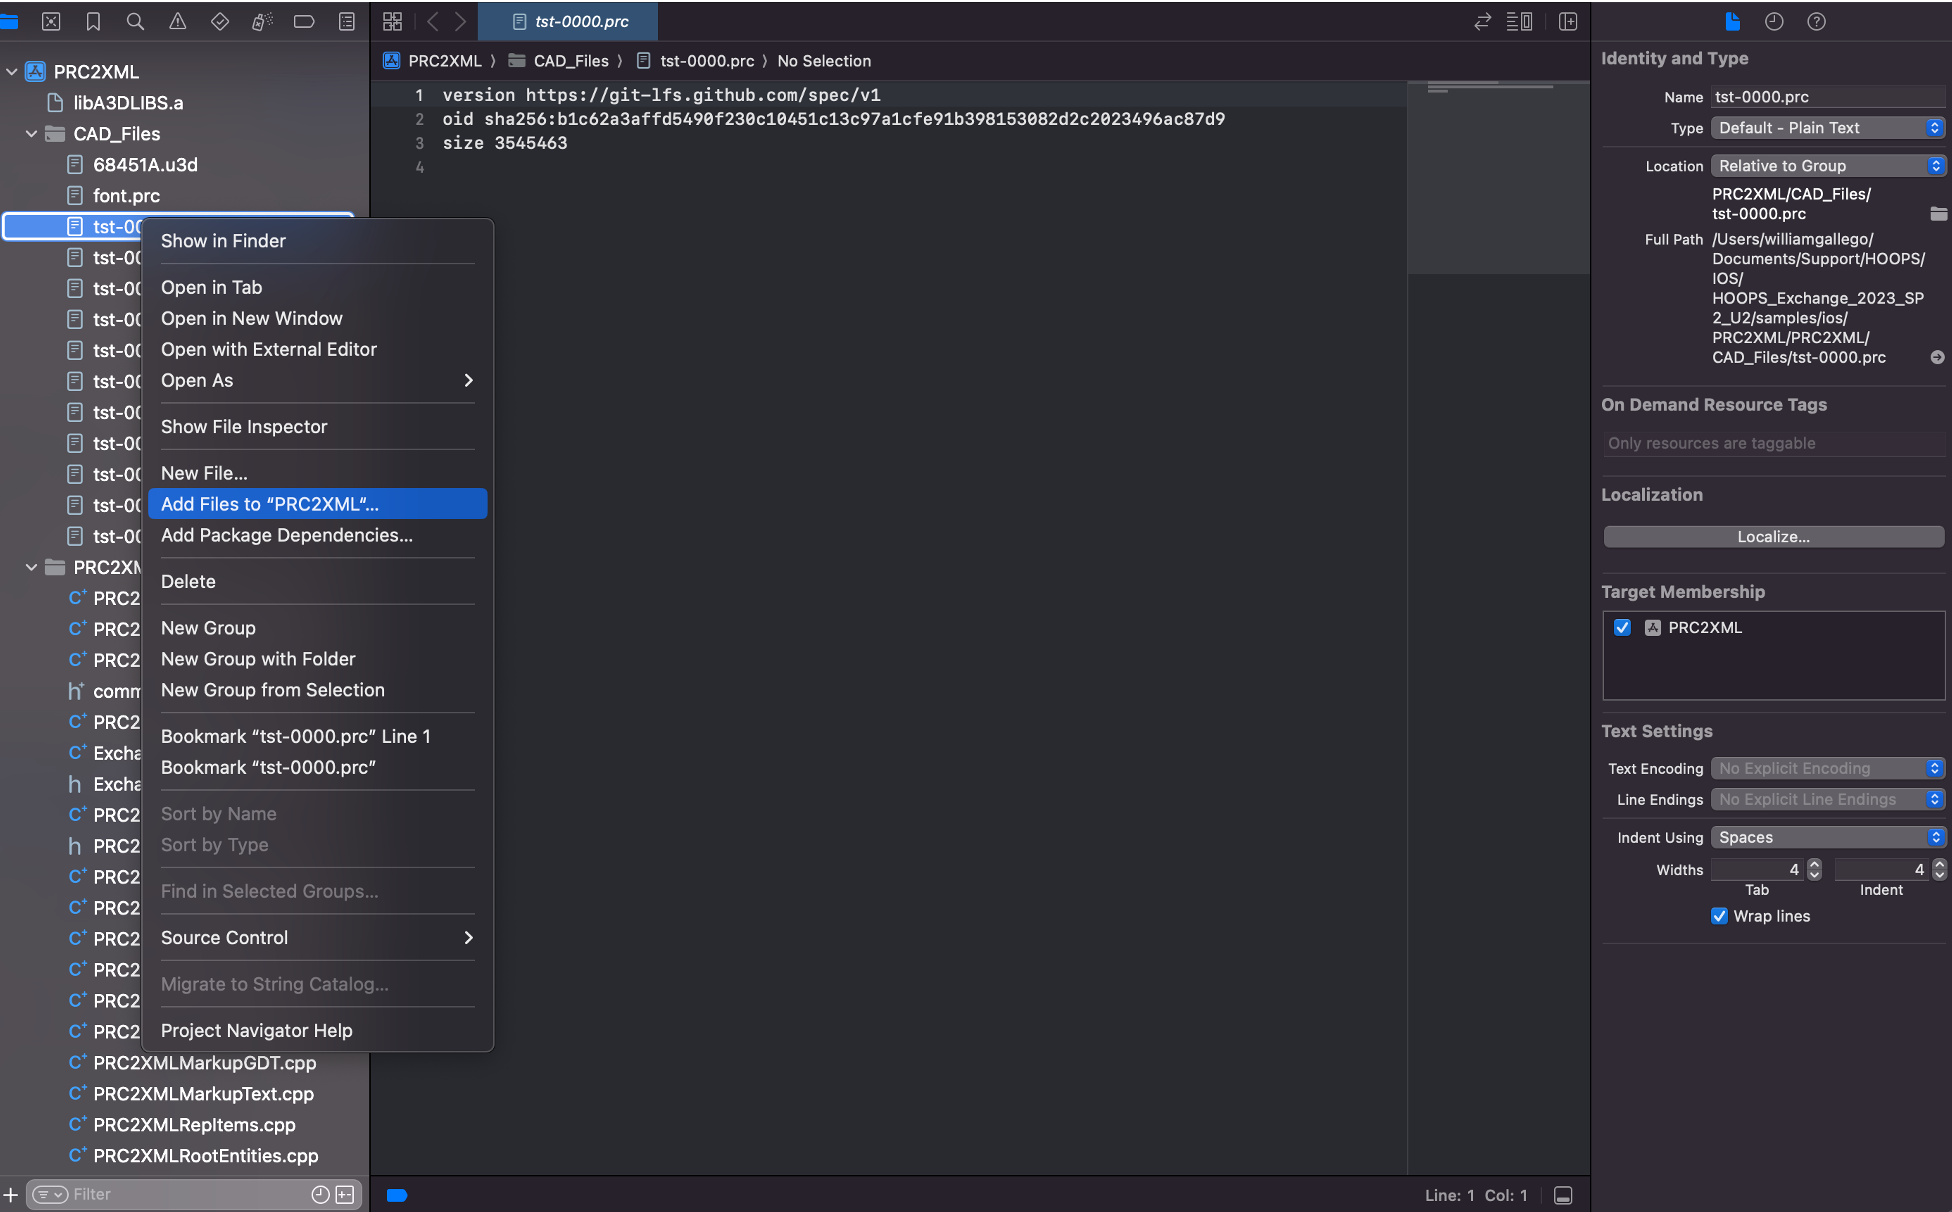
- Build the sample.
- Go to the tab
Product>Build For>Running
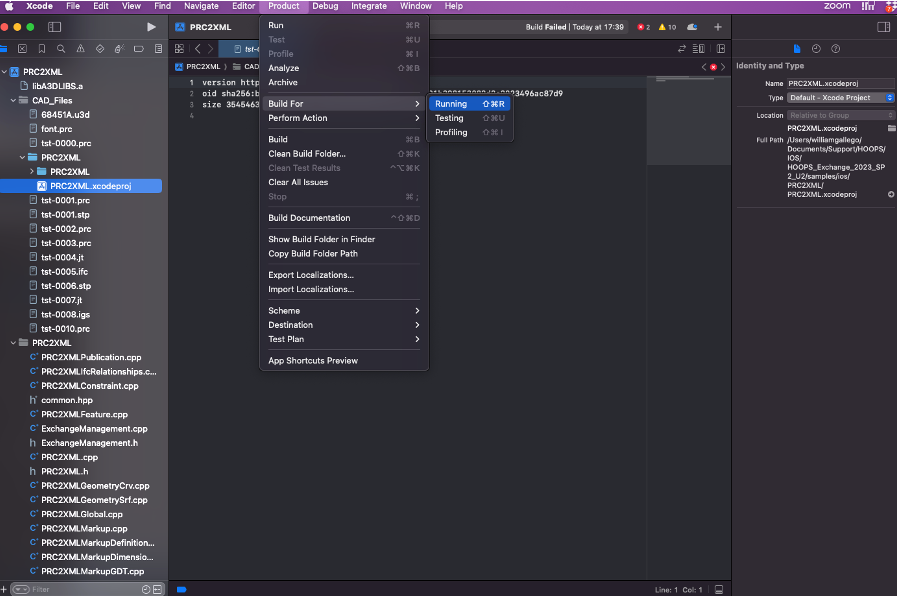
Test a sample
- Run the sample
PRC2XML - Go to the tab
Product>Run
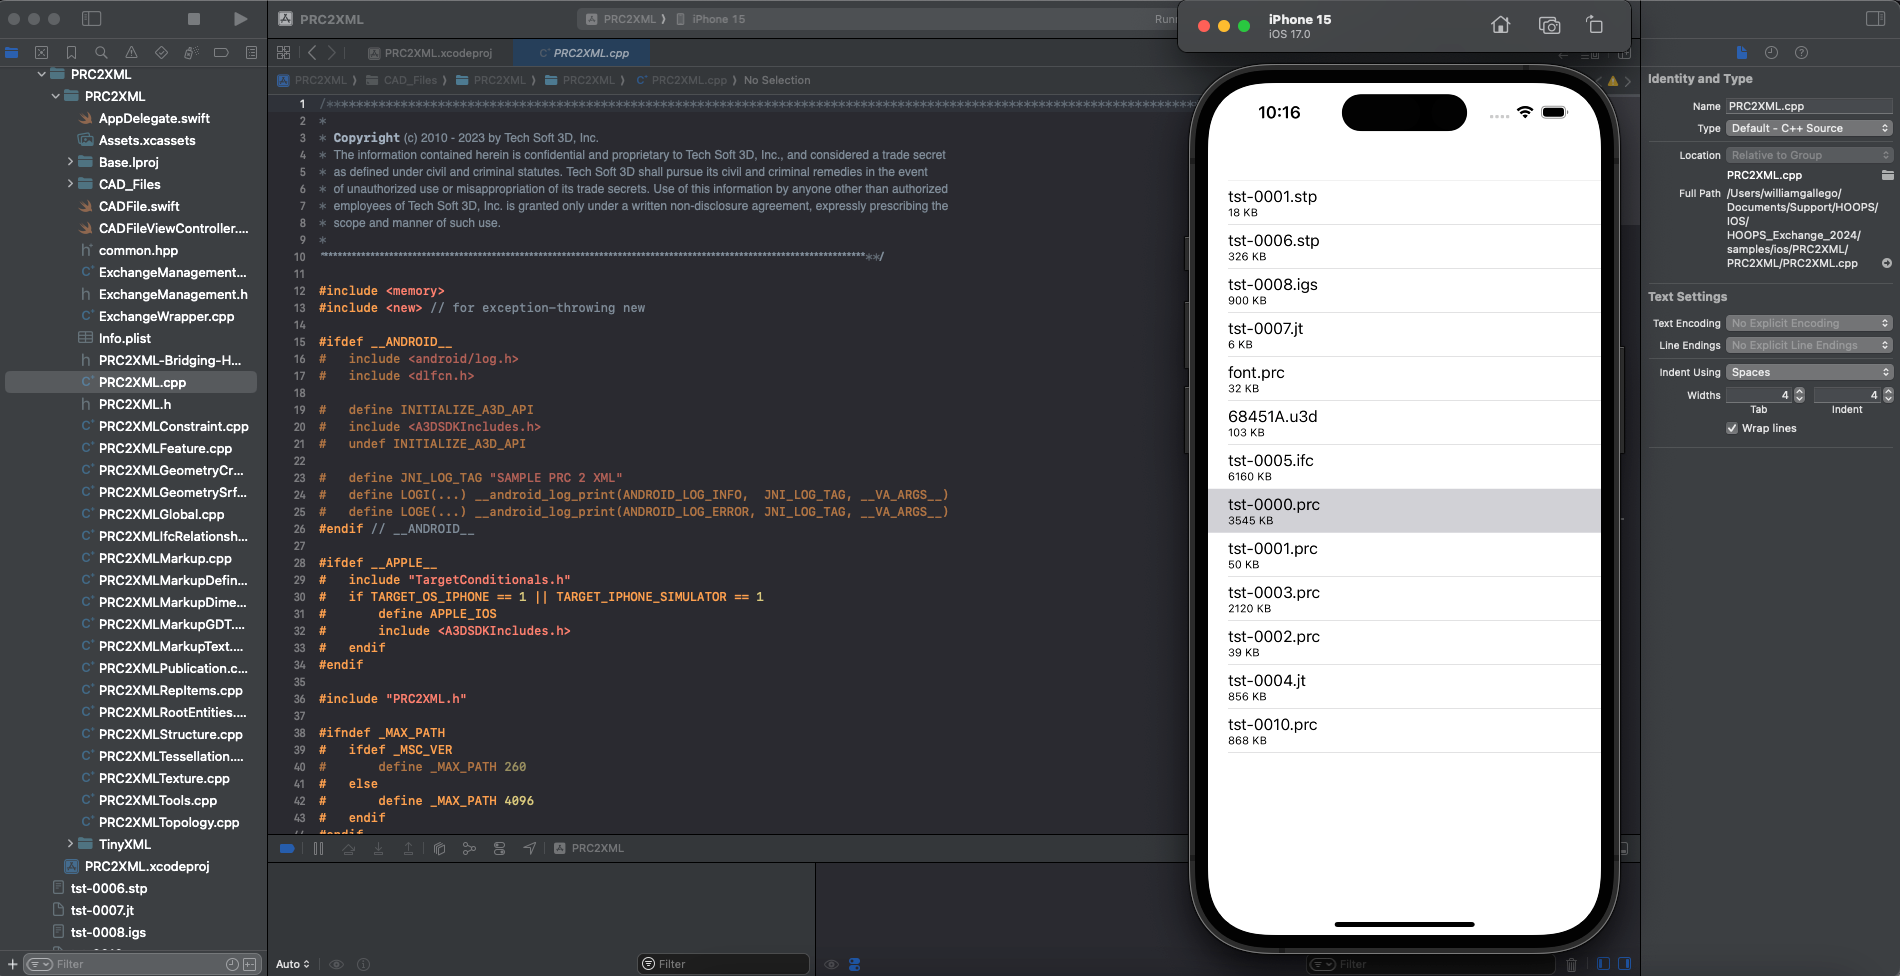
- The iOS simulator will be launched:
- Click on the
ts-0000.prc - The
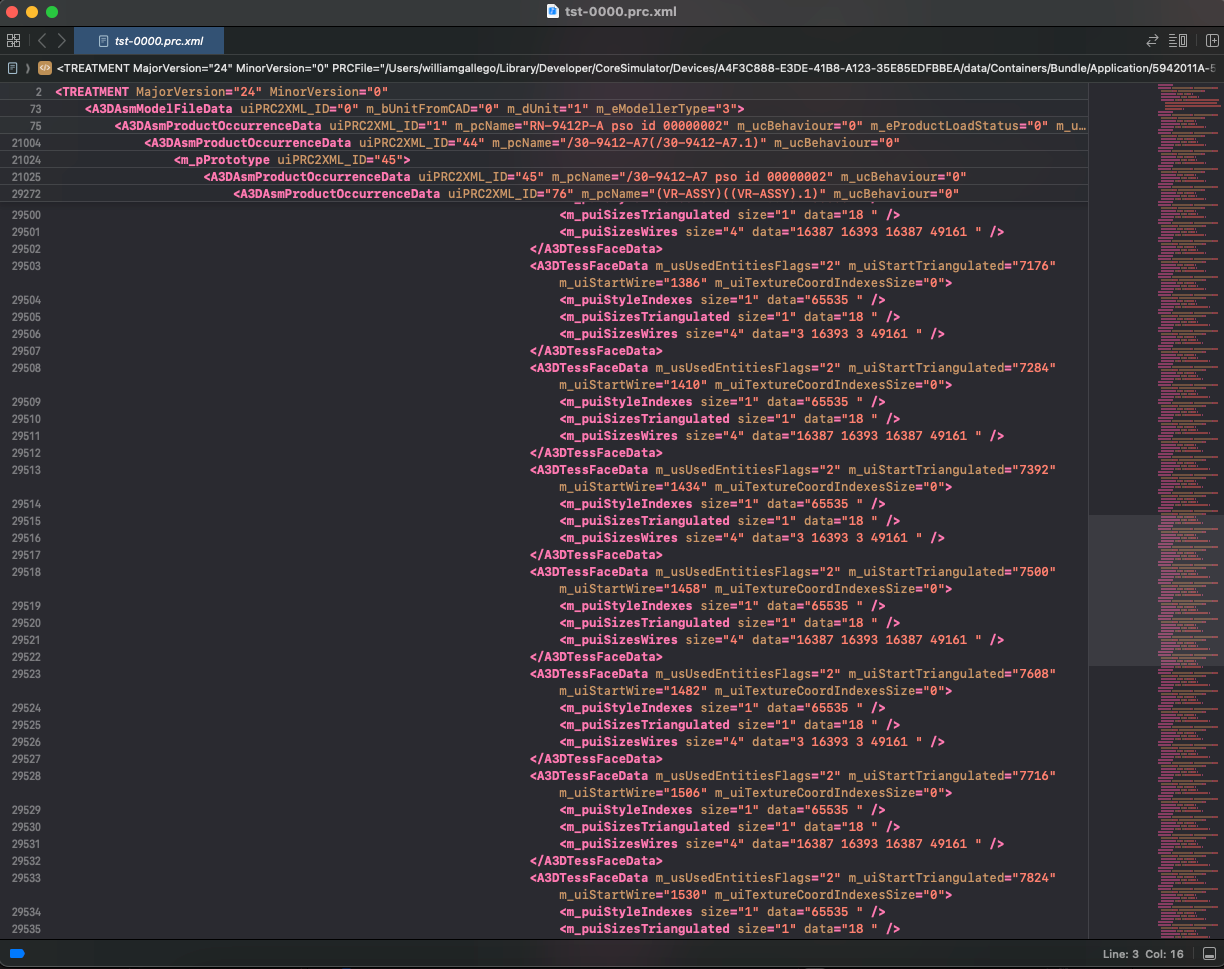
ts-0000.prc.xmlfile will be generated containing the dump of the PRC file structure in your output folder:
/Users/me/Library/Developer/CoreSimulator/Devices/XXXX/data/Containers/Data/Application/XXXX/Documents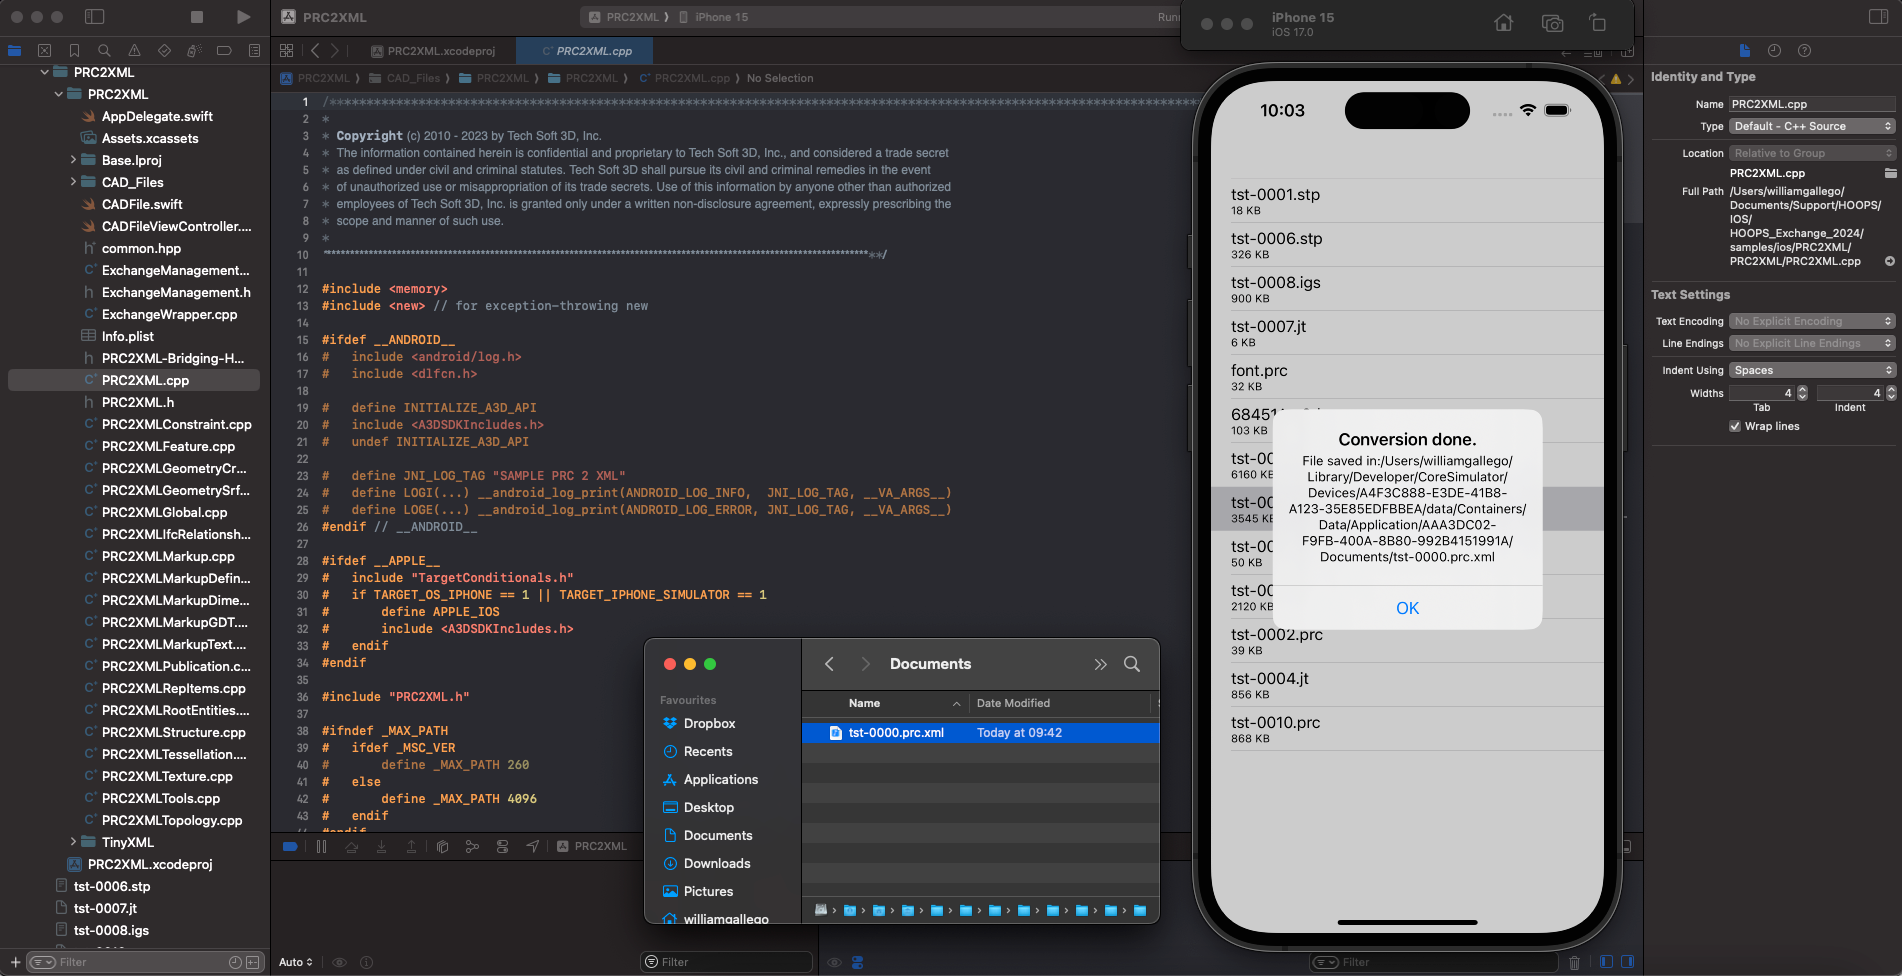
- The file
ts-0000.prcis the result of a CAD file being imported and converted to PRC format by HOOPS Exchange - The resulting
ts-0000.prc.xmlfile is the dump of the tree structure of the PRC file. - Open the XML file to navigate the structure and the dump of the CAD file.
- Run the sample
B-Rep Adaptor
| C/C++ | samples/exchange/exchange/advanced_functions/BrepAdaptor |
|---|---|
| C# | csharp/samples/exchange/advanced_functions/BRepAdaptor |
B-Rep Adaptor shows how to make use of A3DAdaptAndReplaceAllBrepInModelFileAdvanced() to adapt B-rep models to your particular needs.
Callbacks Report
| C# | csharp/samples/exchange/hello_world/CallbacksReport |
|---|
This application initializes HOOPS Exchange, then load a CAD file. It writes the Exchange log to a file (or standard console output if not specified). It also implements the message, warning and error callbacks.
Cascaded Attributes
| C/C++ | samples/exchange/exchange/prc_model/CascadedAttributes |
|---|
This sample demonstrates how to programmatically set the mechanism of the cascaded attributes using HOOPS Exchange.
Collision Detection
| C/C++ | samples/exchange/exchange/advanced_functions/Collision |
|---|
This sample illustrates the collision detection feature in HOOPS Exchange. The sample reads an input CAD file and outputs collision status between representation items. The user may select which items are tested using their UUIDs; the output is available as a report file.
Count Part Instances
| C# | csharp/samples/exchange/prc_model/CountPartInstances |
|---|
This application initializes HOOPS Exchange, then walks the product structure to find all part instances. It writes the part instance count to a log file (or standard console output if not specified).
Create PRC B-Rep
| C/C++ | samples/exchange/exchange/prc_model/CreatePRCBrepWithGeometry |
|---|
This sample demonstrates how to programmatically create a PRC file using HOOPS Exchange. The only input is the file path. The program generates a PRC file which contains a warped circle with a thick edge.
Create PRC Cubes
| C/C++ | samples/exchange/exchange/prc_model/CreatePRCCubes |
|---|---|
| C# | csharp/samples/exchange/prc_model/CreatePRCCubes |
This sample demonstrates how to create a PRC file with the Exchange API. The only input is the output file path. The program generates a PRC file containing a tessellated textured cube that is instantiated multiple times. The generated output also contains PMIs and Views, as well as links between markups, Views, and entities.
Dump Feature Tree
| C/C++ | samples/exchange/exchange/prc_model/DumpFeatureTree |
|---|---|
| C# | csharp/samples/exchange/prc_model/DumpFeatureTree |
This sample demonstrates how to traverse a model and capture its features in an XML file.
Import Export
| C/C++ | samples/exchange/exchange/hello_world/ImportExport | Tutorial |
|---|---|---|
| C# | csharp/samples/exchange/hello_world/ImportExport | Tutorial |
This sample demonstrates how to programmatically import a CAD model using HOOPS Exchange and convert it to another format.
Note
Experimental USD export
Since HOOPS Exchange 2025.4.0, we support exporting to USD as an experimental feature. The Import Export sample can be extended to provide this functionnality. For more information, see Extending the Import Export Sample.
Incremental Load
| C/C++ | samples/exchange/exchange/reading_modes/IncrementalLoad |
|---|---|
| C# | csharp/samples/exchange/reading_modes/IncrementalLoad |
This sample demonstrates two ways of loading a CAD file: normal loading and incremental loading (first the assembly tree, then the parts contained in the file). Using the incremental loading technique allows a more fine-grained approach, which is especially beneficial when dealing with huge files (e.g., for loading only specific items at a time rather than the whole file in one shot). The only input is the file path.
Mesh Viewer
| C/C++ | GitHub | Write a CAD Viewer |
|---|---|---|
| C/C++ | samples/exchange/exchange/viewers/Viewer |
The Mesh Viewer example, added in HOOPS Exchange 2023 SP2 U1, demonstrates how to use the new usability API to access mesh data in representation models.
The Write a CAD Viewer tutorial provides more information about it.
Multiple PRC Files
| C/C++ | samples/exchange/exchange/reading_modes/MultiplePRCFiles |
|---|
This sample demonstrates how to programmatically create and read multiple PRC files from a CAD assembly using HOOPS Exchange. The input is the CAD assembly file path and a directory. The program generates multiple PRC files from this CAD assembly.
This mode is supported for the following formats: V4, V5, ProE, UG, SLDW. With other formats, only one PRC file is generated.
Multiple Configurations
| C/C++ | samples/exchange/exchange/reading_modes/LoadMultiConfigCADFile |
|---|
This sample demonstrates how to programmatically load CAD files that contain multiple configurations using HOOPS Exchange. The only input is the file path.
PRC to XML
| C/C++ | samples/exchange/exchange/prc_model/PRC2XML |
|---|
PRC to IFC XML
| C/C++ | samples/exchange/exchange/prc_model/PRC2IFCXML |
|---|
Converts a PRC file to an IFC XML representation.
Print Assembly Structure
| C/C++ | PrintAssemblyStructure.cpp |
Tutorial |
|---|---|---|
| C# | csharp/samples/exchange/prc_model/PrintProductStructure |
Publish PRC Cubes
| C/C++ using Advanced Publishing | samples/exchange/exchange/publishing/PublishPRCCubes |
|---|
The advanced publishing version of the sample is similar to the standard one, but also writes the result in PDF views.
Sew B-Rep
| C/C++ | samples/exchange/exchange/advanced_functions/SewBrep |
|---|
This sample demonstrates how to programmatically adapt B-rep models to particular needs using HOOPS Exchange.
The only input is the CAD file path.
- Load a CAD file
- Traverse the entire data structure
- Call A3DSewBrep for each B-rep model
- New modified data are populated
- PRC is exported from the modified data
Shattered
| C/C++ | samples/exchange/exchange/reading_modes/Shattered |
|---|
This sample demonstrates how to use the shattered mode in HOOPS Exchange. The input is the CAD assembly file path and a directory. The program generates multiple PRC files from this CAD assembly.
- Load a CAD assembly
- Extract all dependencies from the CAD assembly
- Convert CAD part files to PRC
- Convert CAD assembly files to PRC
- Reload the full model into memory from the previously created PRC files.
Translate to PK Parts
| C/C++ | samples/exchange/exchange/bridges/TranslateToPkParts |
|---|
This sample demonstrates how to use the Parasolid bridge in HOOPS Exchange to send the converted CAD data to Parasolid and then use the Parasolid APIs to perform advanced functions on the geometry, like healing, merge, simplify, sew, or accurate edges.
The input is the CAD file path and a directory plus the options. The program generates a Parasolid file from this CAD file. Please note that this sample won’t compile right away, specific things (detailed in the header of the source file) related to the Parasolid setup need to be done before running it.
Anim Work Instructions
| C/C++ | samples/exchange/exchange/publishing/AnimWorkinstruction |
|---|
This sample creates an example Work Instruction from a PDF template by populating text fields and adding JavaScript to buttons to set the camera position and model entity states (visibility and transform) based on viewpoint states stored in the source PRC file.
Demo Data Model
| C/C++ | samples/exchange/exchange/publishing/DemoDataModel |
|---|
Demonstrates how to create a rich interactive PDF without using JavaScript. By pushing data into specific structures and binding data to the layout, rich interactive PDF can be created. Text fields, lists, and scrolling tables can typically be updated automatically depending on what’s been selected by the user.
Demo Functionalities
| C/C++ | samples/exchange/exchange/publishing/DemoFunctionalities |
|---|
This sample application demonstrates how to create a document with different pages inserted from different sources. It also demonstrates the creation of tables on a PDF page.
Demo Functionalities Advanced
| C/C++ | samples/exchange/exchange/publishing/DemoFunctionalitiesAdv |
|---|
This sample application demonstrates miscellaneous functionalities for Advanced Publishing Advanced.
Demo Layers
| C/C++ | samples/exchange/exchange/publishing/DemoLayers |
|---|
This sample application demonstrates how to generate a PDF document with layers using Advanced Publishing.
Export 3D to HTML
| C/C++ | samples/exchange/exchange/publishing/Export3DToHtml |
|---|
This sample application demonstrates how to export a 3D model to HTML using Advanced Publishing. The sample shows how to generate a single monolithic HTML file and also how to generate an SCS stream cache file to be used with an HTTP server. Note that a sample HTTP server is provided to demonstrate how to implement an SCS workflow. See the section Viewing 3D in the Browser in our Programming Guide for more details.
Export PDF to HTML
| C/C++ | samples/exchange/exchange/publishing/ExportPDFToHtml |
|---|
This sample application demonstrates how to export an interactive 3D PDF to HTML using Advanced Publishing. The sample shows how to generate a root XML file with the associated resources (HTML, JavaScript …) to be used with an HTTP server. Note that a python script is given to generate files which can be consumed without HTTP server. See the section Viewing PDF in the Browser in our Programming Guide for more details.
Import Publish
| C/C++ | samples/exchange/exchange/hello_world/ImportPublish | Tutorial |
|---|
This sample creates a simple 3D PDF programmatically without using a template.
A detailed version of this sample is provided in import_publish.
Manufacturing MBE
| C/C++ | samples/exchange/exchange/manufacturing_mbe |
|---|
Shows how to create a Technical Data Package. It works with 3D annotated models and demonstrates how to insert 3D elements, how to add a view carousel that activates annotation views, and how to attach files (such as STEP files) to create a TDP.
It also demonstrates how to link 2D and 3D content and update what’s displayed in some text fields when certain PMI are selected.
PDF With BOM and Carousel
| C/C++ | samples/exchange/exchange/publishing/PDFWithBOMAndCarousel |
|---|
Demonstrates how to create a scrolling table with 3D assemblies. The scrolling table represents a Bill of Materials. When a line is selected, the 3D part it’s linked to is highlighted. Conversely when a 3D node is selected in the scene, the table line it’s linked to is highlighted
U3D With Animation
| C/C++ | samples/exchange/exchange/publishing/U3DWithAnimation |
|---|
Based on a supplied PDF template, this sample shows how to activate an animation in a U3D file with a button click in a PDF form.
Update Data
| C/C++ | samples/exchange/exchange/publishing/UpdateData |
|---|
This sample application demonstrates how to update a PDF file generated with Tetra 4D Enrich, using Advanced Publishing. See the section Using Tetra 4D Enrich templates in our Programming Guide for more details.
User Defined Views
| C/C++ | samples/exchange/exchange/publishing/UserDefinedViews |
|---|
This sample demonstrates how to create and activate a simple view that changes camera when clicking on a button.

